

Building a Real-time Notification System with RethinkDB
- Keet Malin Sugathadasa
- Aug 17, 2018
- 5 min read
Have you ever wondered how to build a realtime notification system using a push mechanism? The best way would be to have a listener or an app to poll for notifications from time to time. Invoking actions based on event listening is the norm these days, where databases and other storage mechanisms provide such capabilities. But having this in realtime is a challenge, where most do not provide capabilities to invoke external actions like API calls.
You might wonder whether triggering would be good for this purpose. It is!!! But, triggering is only limited to internal actions like record updates, record inserts etc. Storage systems like AWS Simple Storage Service (S3) provides external action invocations to allow 3rd party API calls. But, to have this same functionality in a database, is available in databases like Firebase and RethinkDB, which provides realtime push notifications to a listener of our preference.
This article is mainly based on RethinkDB and you can get a clear idea by visiting the official website. It would also make your life easy, if you understand the basics of socket.io, before proceeding further. With this, let's dig deep into RethinkDB.
Introduction
RethinkDB is the first open-source, scalable JSON database built especially for the realtime web. This revolutionizes the flow of data in real-time applications by allowing high scalability and push/pull capabilities. Realtime web is where applications are notified about the changes of data in realtime. Just imagine that you are building an application that needs to be updated, whenever a change in a database is made. The two options available are:
1) Polling
2) Push Notifications
With polling, your application can continuously poll the database and check for changes, and notify the front-end accordingly. This approach is clean and simple, but the main drawback is on performance where the application has to keep on polling for changes all the time. This is where push notifications come into play. RethinkDB gives a new database model, that allows applications to receive push notifications in real-time, instead of using traditional methods such as polling. This architecture allows RethinkDB to quickly allow developers to build scalable, realtime applications within seconds.
To get a general understanding on how polling and push notifications work, have a look at the architectures given below. If you already know these stuff, go right ahead to the GETTING STARTED section.
General Architecture for Polling
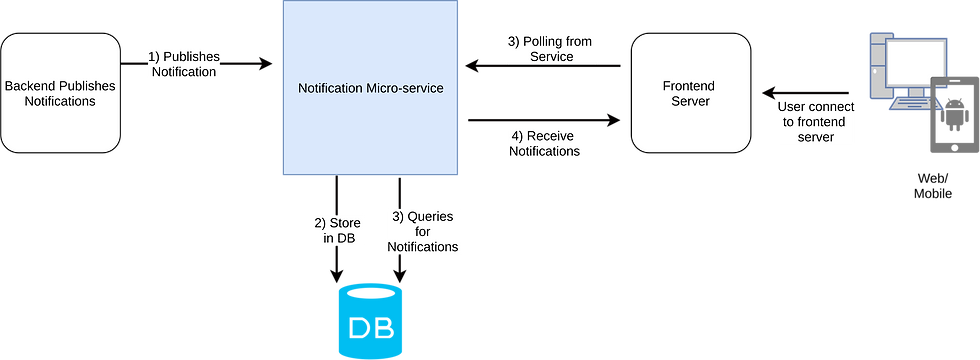
Pros
Application can handle polling times in a flexible manner
Simple architecture where inter-component dependencies are less
Massive sets of transactions in parallel/partitioned can be handled in even smaller execution windows
Increase in processing power means increase in data set that can be dealt with.
We can get what we want when we want it via scheduling.
Predictive support, predictive failures, predictive model - leading to standardization, and automation.
Cons
Requires a Landing Area (in memory storage) for the transformed data sets.
Requires massive sets of processing power (for large data)
Batch Windows are continually shrinking while data sets are ever growing.
Batch Window: The time available for an intensive batch processing operation such as a disk backup.
Requires sources be defined beforehand (less flexibility).
Overwhelms the front-end if polling happens in short windows.
General Architecture for Push Notifications
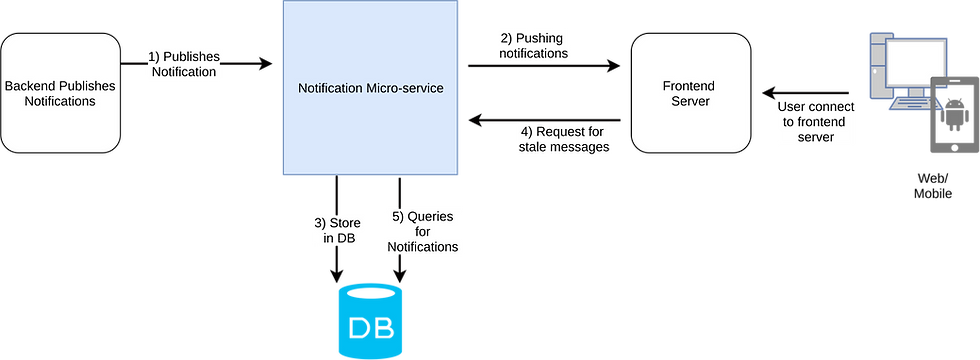
Pros
Instant transaction communication
Transaction by Transaction / Guaranteed delivery mechanisms.
Guaranteed Ordered mechanisms
Mass Distribution, or publish subscribe to those that want it.
New sources can come on-line and push out new transactions
Feedback on the transaction after the business processes are invoked.
Cons
Independent transactions - meaning can't rely on "history", can't rely on "trends"
Difficult to establish context
Once a transaction is sent - it's gone (unless persisted)
Getting Started with RethinkDB
For this purpose, you need to install the following two components of RethingDB. Read through to understand how to install the two components.
Server component
Client drivers
Installing RethinkDB in your computer can be done in two different ways.
Downloading official packages from this link, and installing them
Building RethinkDB from source code itself using these instructions.
This article will mainly address on how RethinkDB can be installed in Linux (Ubuntu 16.04). To install the server, you have to add the RethinkDB repository to your list of repositories and install via apt-get. To do this, paste the following lines into your terminal:
>>> source /etc/lsb-release && echo "deb http://download.rethinkdb.com/apt $DISTRIB_CODENAME main" | sudo tee /etc/apt/sources.list.d/rethinkdb.list
>>> wget -qO- https://download.rethinkdb.com/apt/pubkey.gpg | sudo apt-key add -
>>> sudo apt-get update
>>> sudo apt-get install rethinkdb
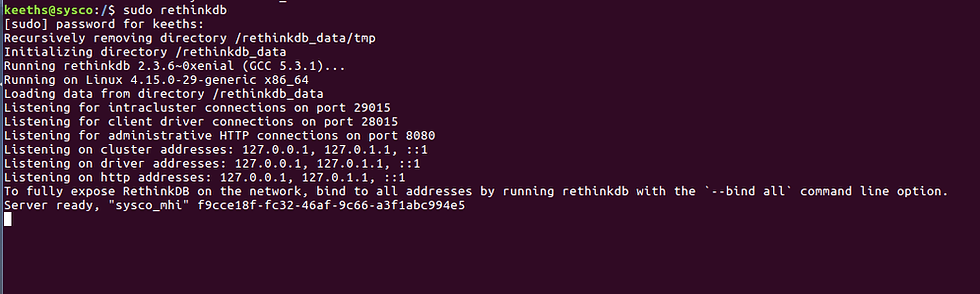
To start the RethinkDB server, open up a terminal and run the following command,
>>> rethinkdb
You will see a response like this on the terminal.
To start RethinkDB in administrative mode, allowing us to manage RethinkDB using a management console, run the following command.
> rethinkdb --bind all

Once the above is running in the terminal, go to "http://localhost:8080/" in the browser to see the management console. The management console will look like this.

Let's Build the Notification System
The notification system in this article, is built via NodeJS, where the entire working code is available on GitHub. The prerequisites for this are as follows. (Link to the Github code)
NodeJS
NPM
The following sections will describe each of the files being used and at the very end, the entire project files are given as a whole.
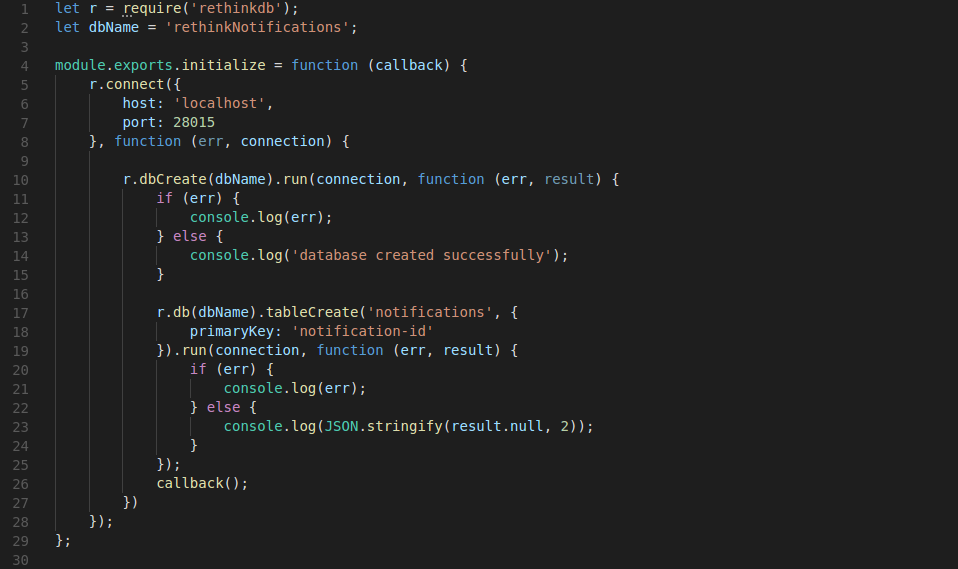
Building the RethinkDB Connection
1) First, import the RethinkBD module into your project using the following line of code.

2) Next, you can play around with RethinkDB using the following commands. Before that, you need to connect your code to RethinkDB running within your system. For this, use the below codeline.

3) Now you can create a database using the following command. The name of the database should be added to the variable "dbName".

4) The following command lets you create a table named "notifications", and assign the primary-key for "notification-id".

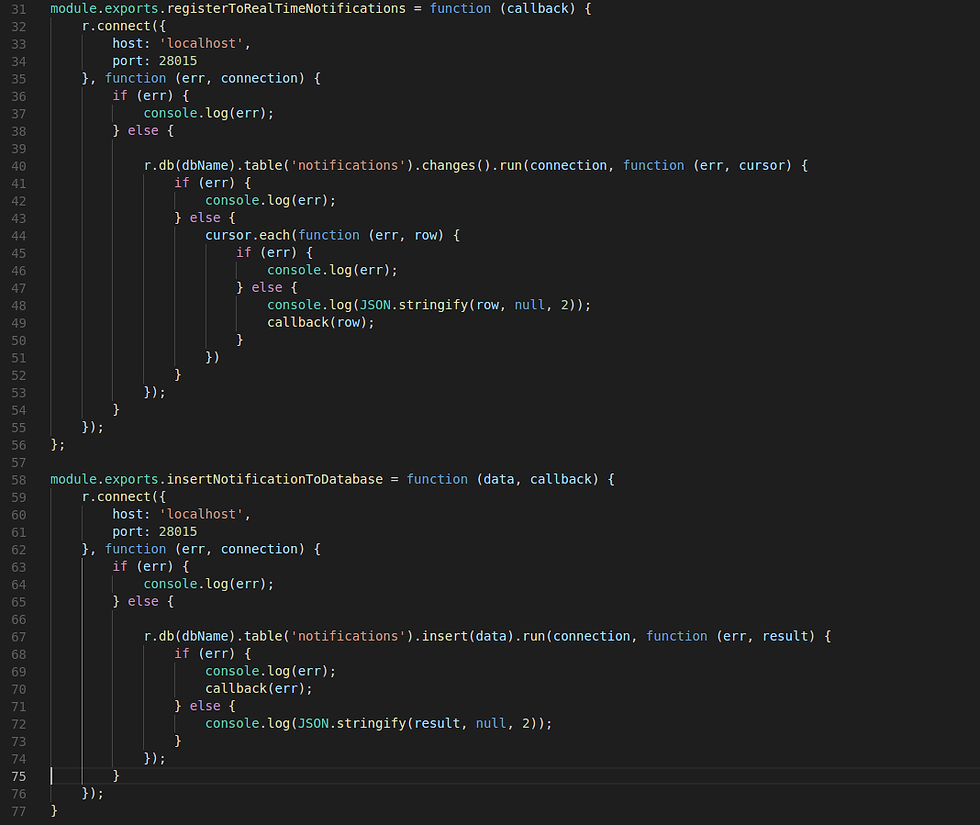
5) Now you can listen to the table named "notifications" to see any changes or events happening within the database. Once your application executes the below code, it will be notified with the relevant change and data.

6) You can use the code given below to insert data into a database table named "notifications".

7) Now, let's have a look at the entire code in full. This is also available in the GitHub Repository.
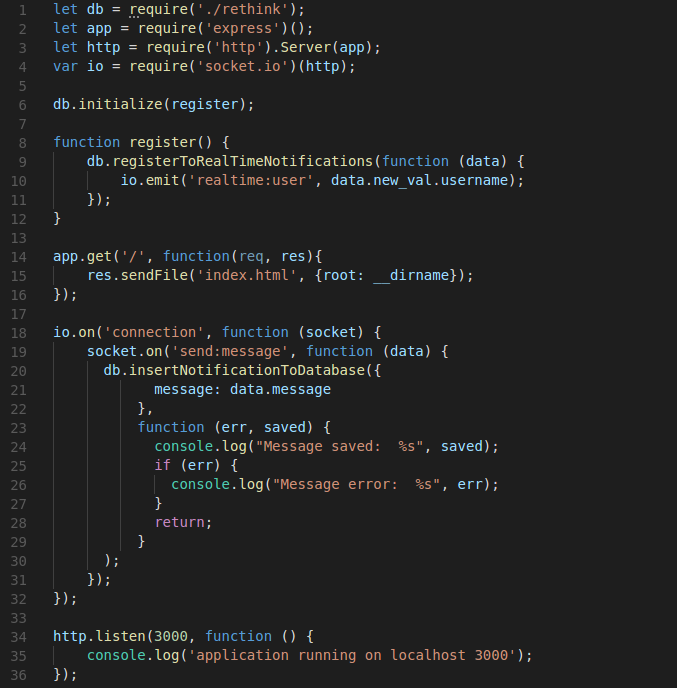
Building the NodeJS Server
Understanding this section would be a walk in the park ;-) if you have a sound knowledge in NodeJS. You may have a look at the code and understand it, as it is self explanatory. Name this file as server.js
Running the Application
Now fire up a terminal and go the folder which has the server.js file in this project. Then run the following commands. (you can get the original project files by cloning this repository)
>>> npm install
>>> node server.js
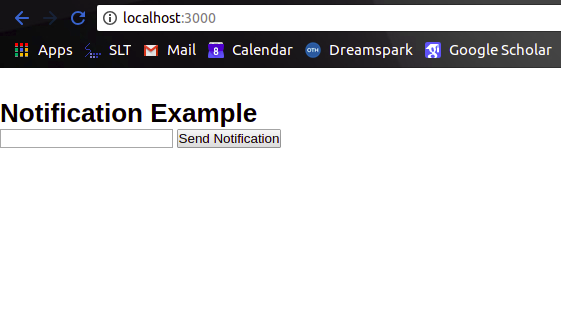
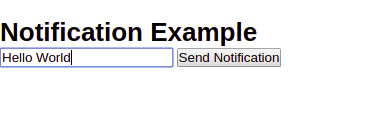
Next, go to the browser and load "localhost:3000". You will see a UI like this.
Testing the Application
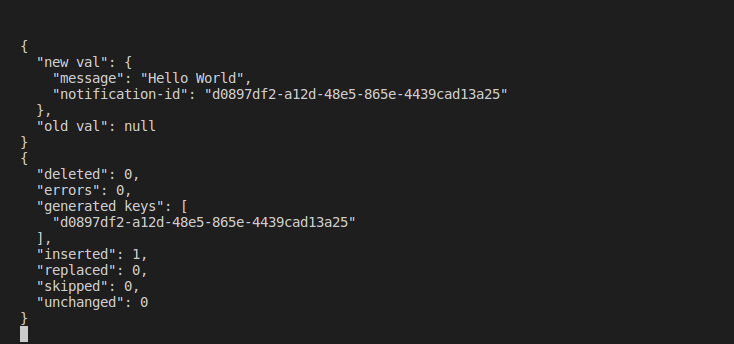
Now let's send the following message to the database.
Instantly, this gets updated in the terminal, notifying that this change has happened...
This working project can be used by you to implement any kind of realtime application, where you simply have to use the concepts given. Even a chat application can be built straight up as needed.
Architecture of this Project
Given below is the high-level architecture of this project, which is self-explanatory.
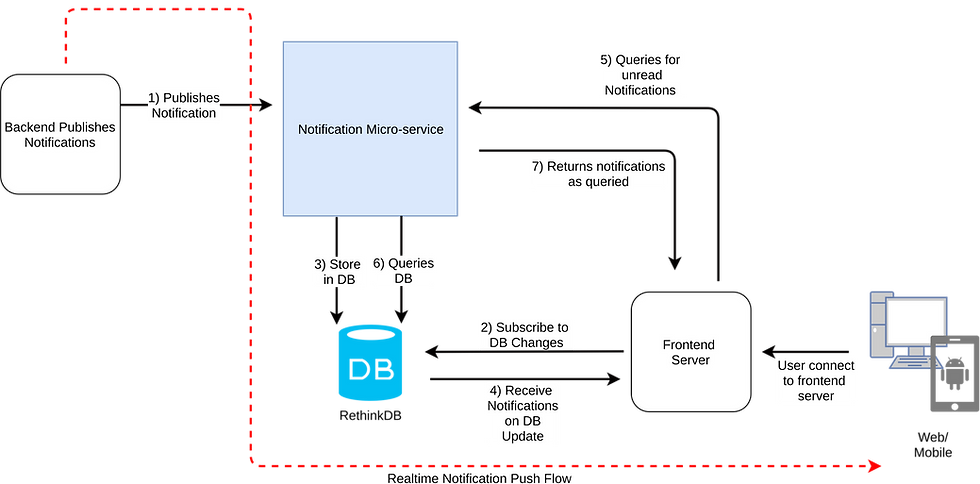
The steps of the above diagram are explained below for better understanding.
The backend publishes notifications to the notification micro-service.
The frontend server will subscribe for DB changes
The notification micro-service will store the notification in the DB
The change in the DB will invoke an action and inform the frontend server.
Query for messages from notification micro-service
The Micro-service will query the database
The results will be returned back to the front-end server.
References


Comments